Fitting our Fob Filter unit is a simple process, requiring only the removal of one trim panel. This is a quick job that should take 15-20 minutes. The battery does not need disconnecting from the vehicle, but the load space will need clearing to allow the rear seats to fold down. The receiver is located under the right hand side trim panel (drivers side in a RHD vehicle), so space around this area is useful to work in.
| Info |
|---|
Your remote fob and receiver should be functioning properly before undertaking fitting this filter. If the remote fob is not working and you are unable to get it to do so, there is another issue that needs investigating first. |
Your filter should come complete with one long cable tie. A couple of tools are required to remove the trim panel:
- A philips screwdriver
- Trim clip removal tools, or some other tool to prise out the clips
- A flat screwdriver
- Optional - scissors or wire cutters
- Fold the rear seats down - they do not need to be rolled forwards.
- Using a trim clip removal tool or other implement, pop out the three push in clips along the edge of the trim panel, and remove the single screw as shown:

Lift the panel starting from the rear seat end. It will need to be levered upwards with moderate force - there are three metal clips along the window edge that the panel should release itself from.
Info These metal clips often become detached from the bodywork - this is not a problem, though try to prevent them falling down into the cavity. They will need to be pushed back onto the bodywork before the panel is refitted.
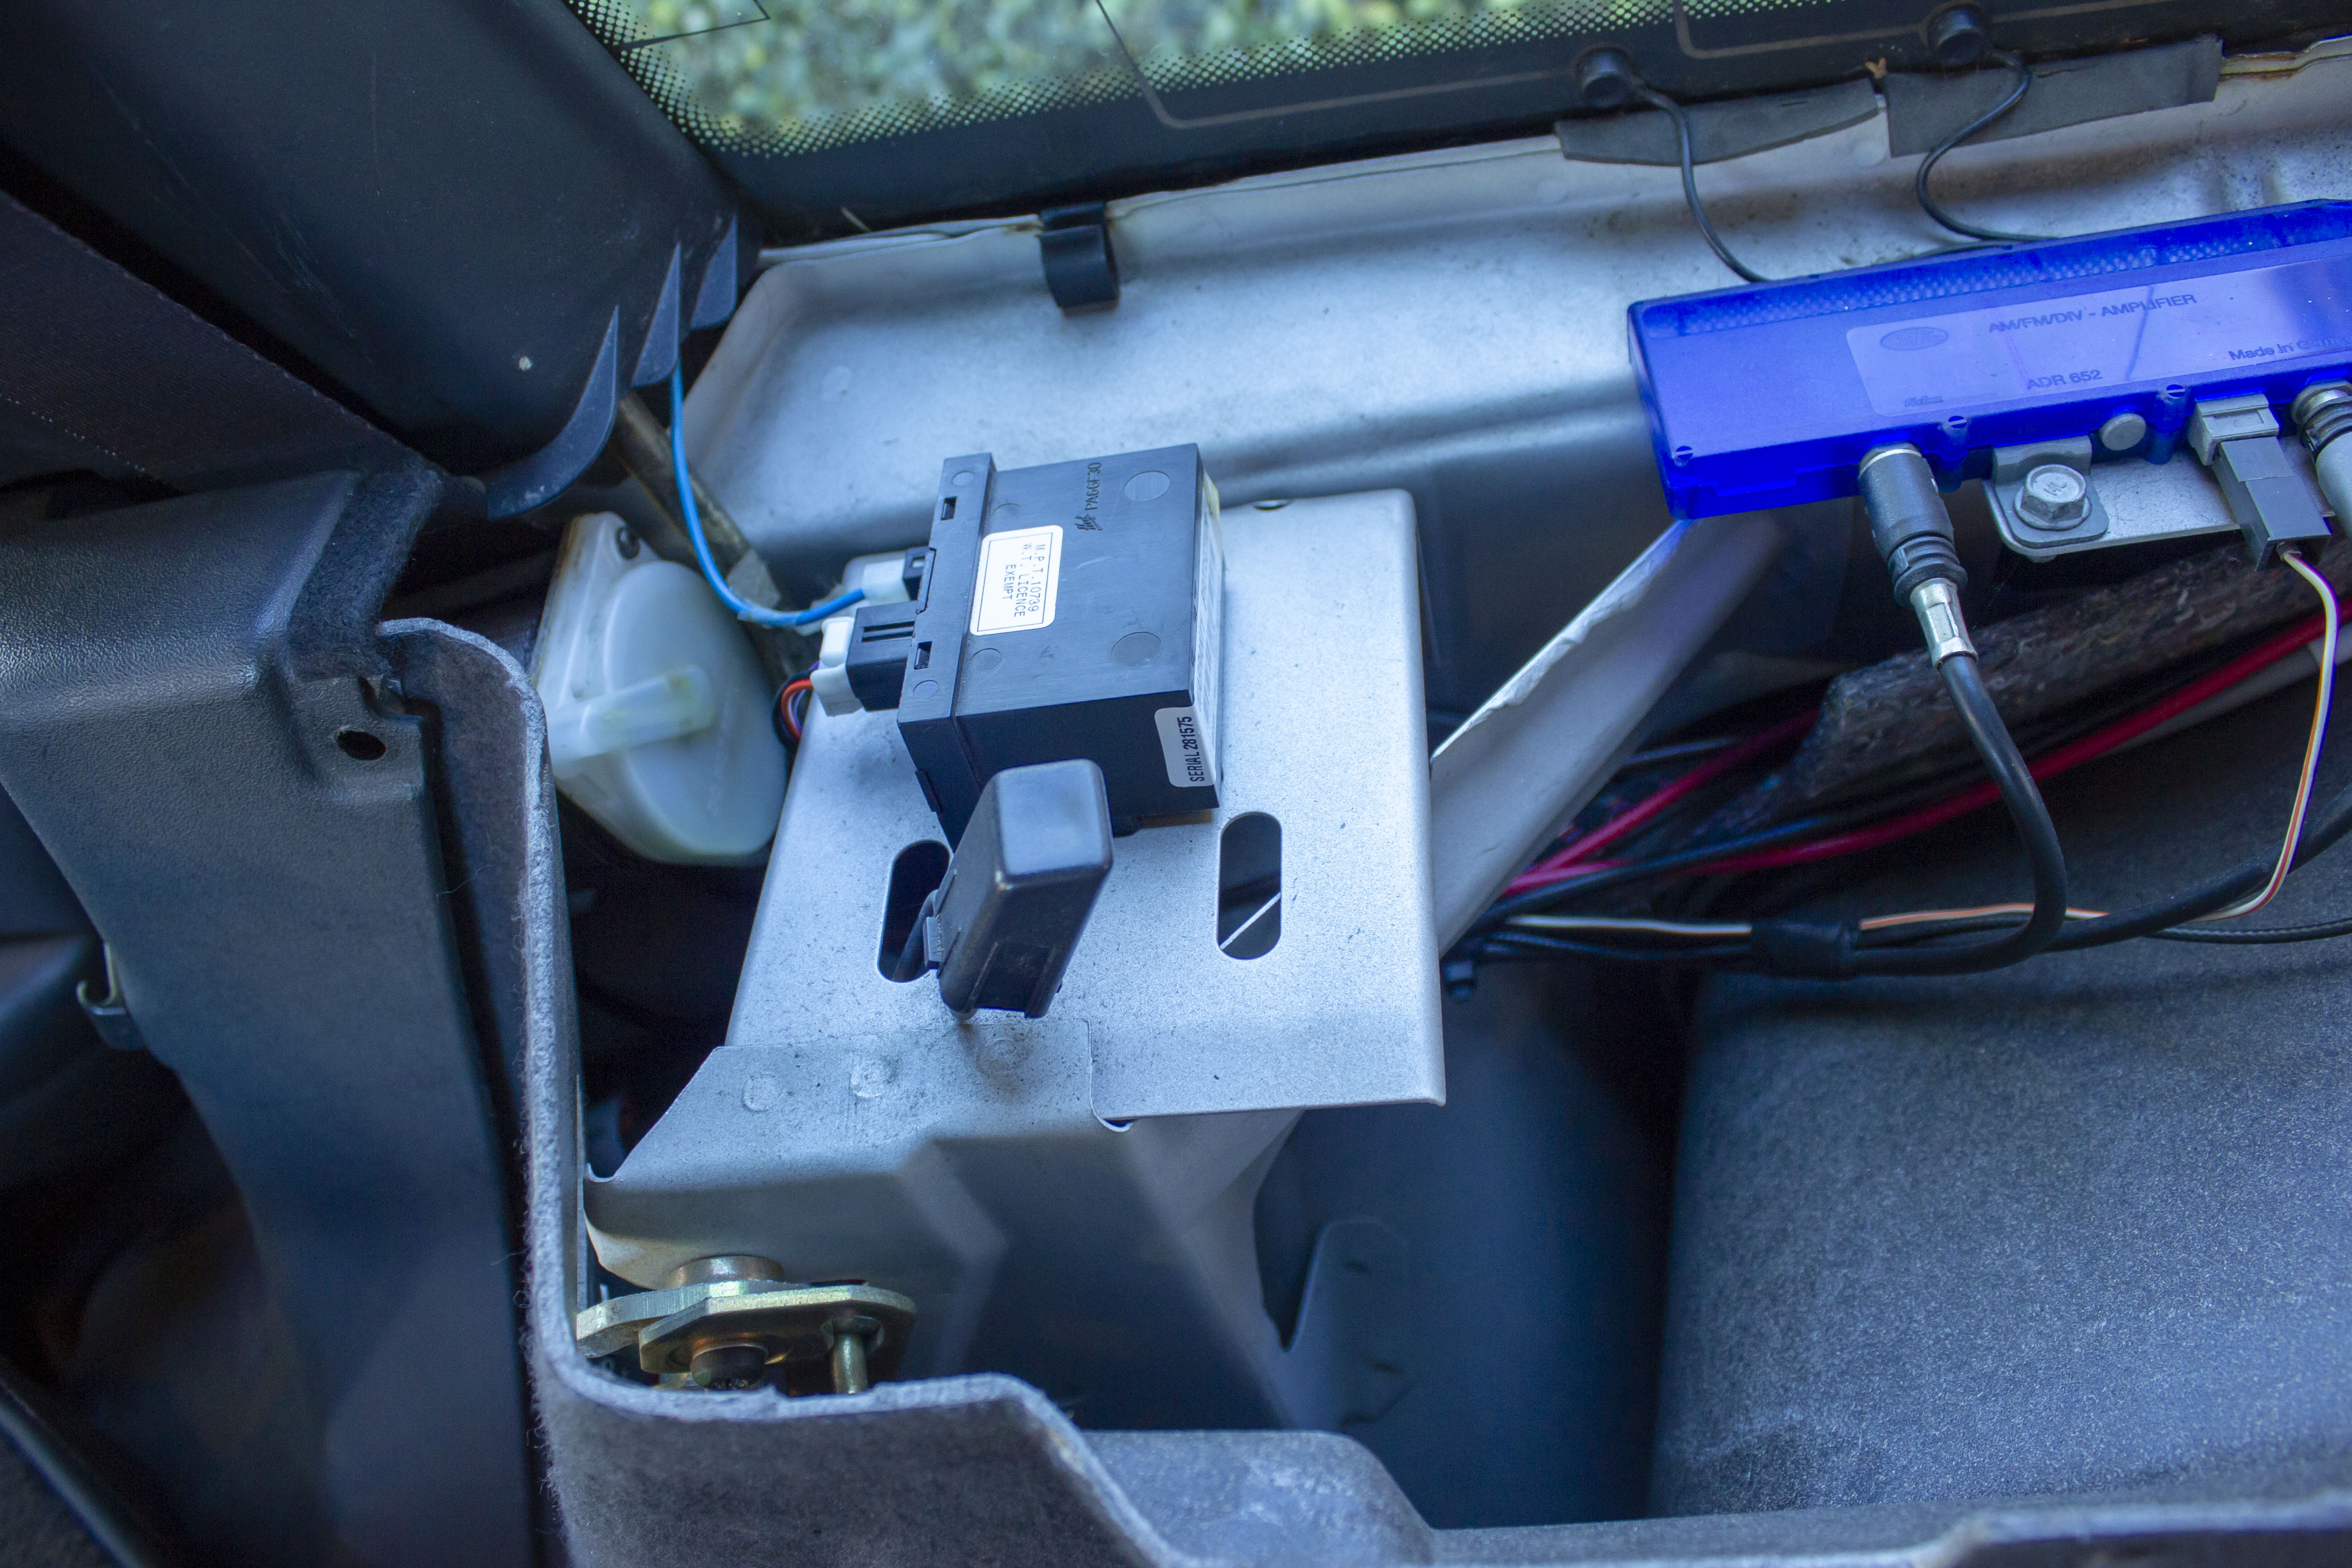
Depending on your model, the blue box in the picture below may not look the same. This is the AM/FM antenna amplifier for the diversity system, it can be ignored.
Set the panel to one side - you should now be able to see the receiver on top of a metal framework, it is the small black box nearest the rear seats.
Position the Fob Filter unit on the inside of the supporting diagonal metalwork, and secure it in place with the provided cable tie.
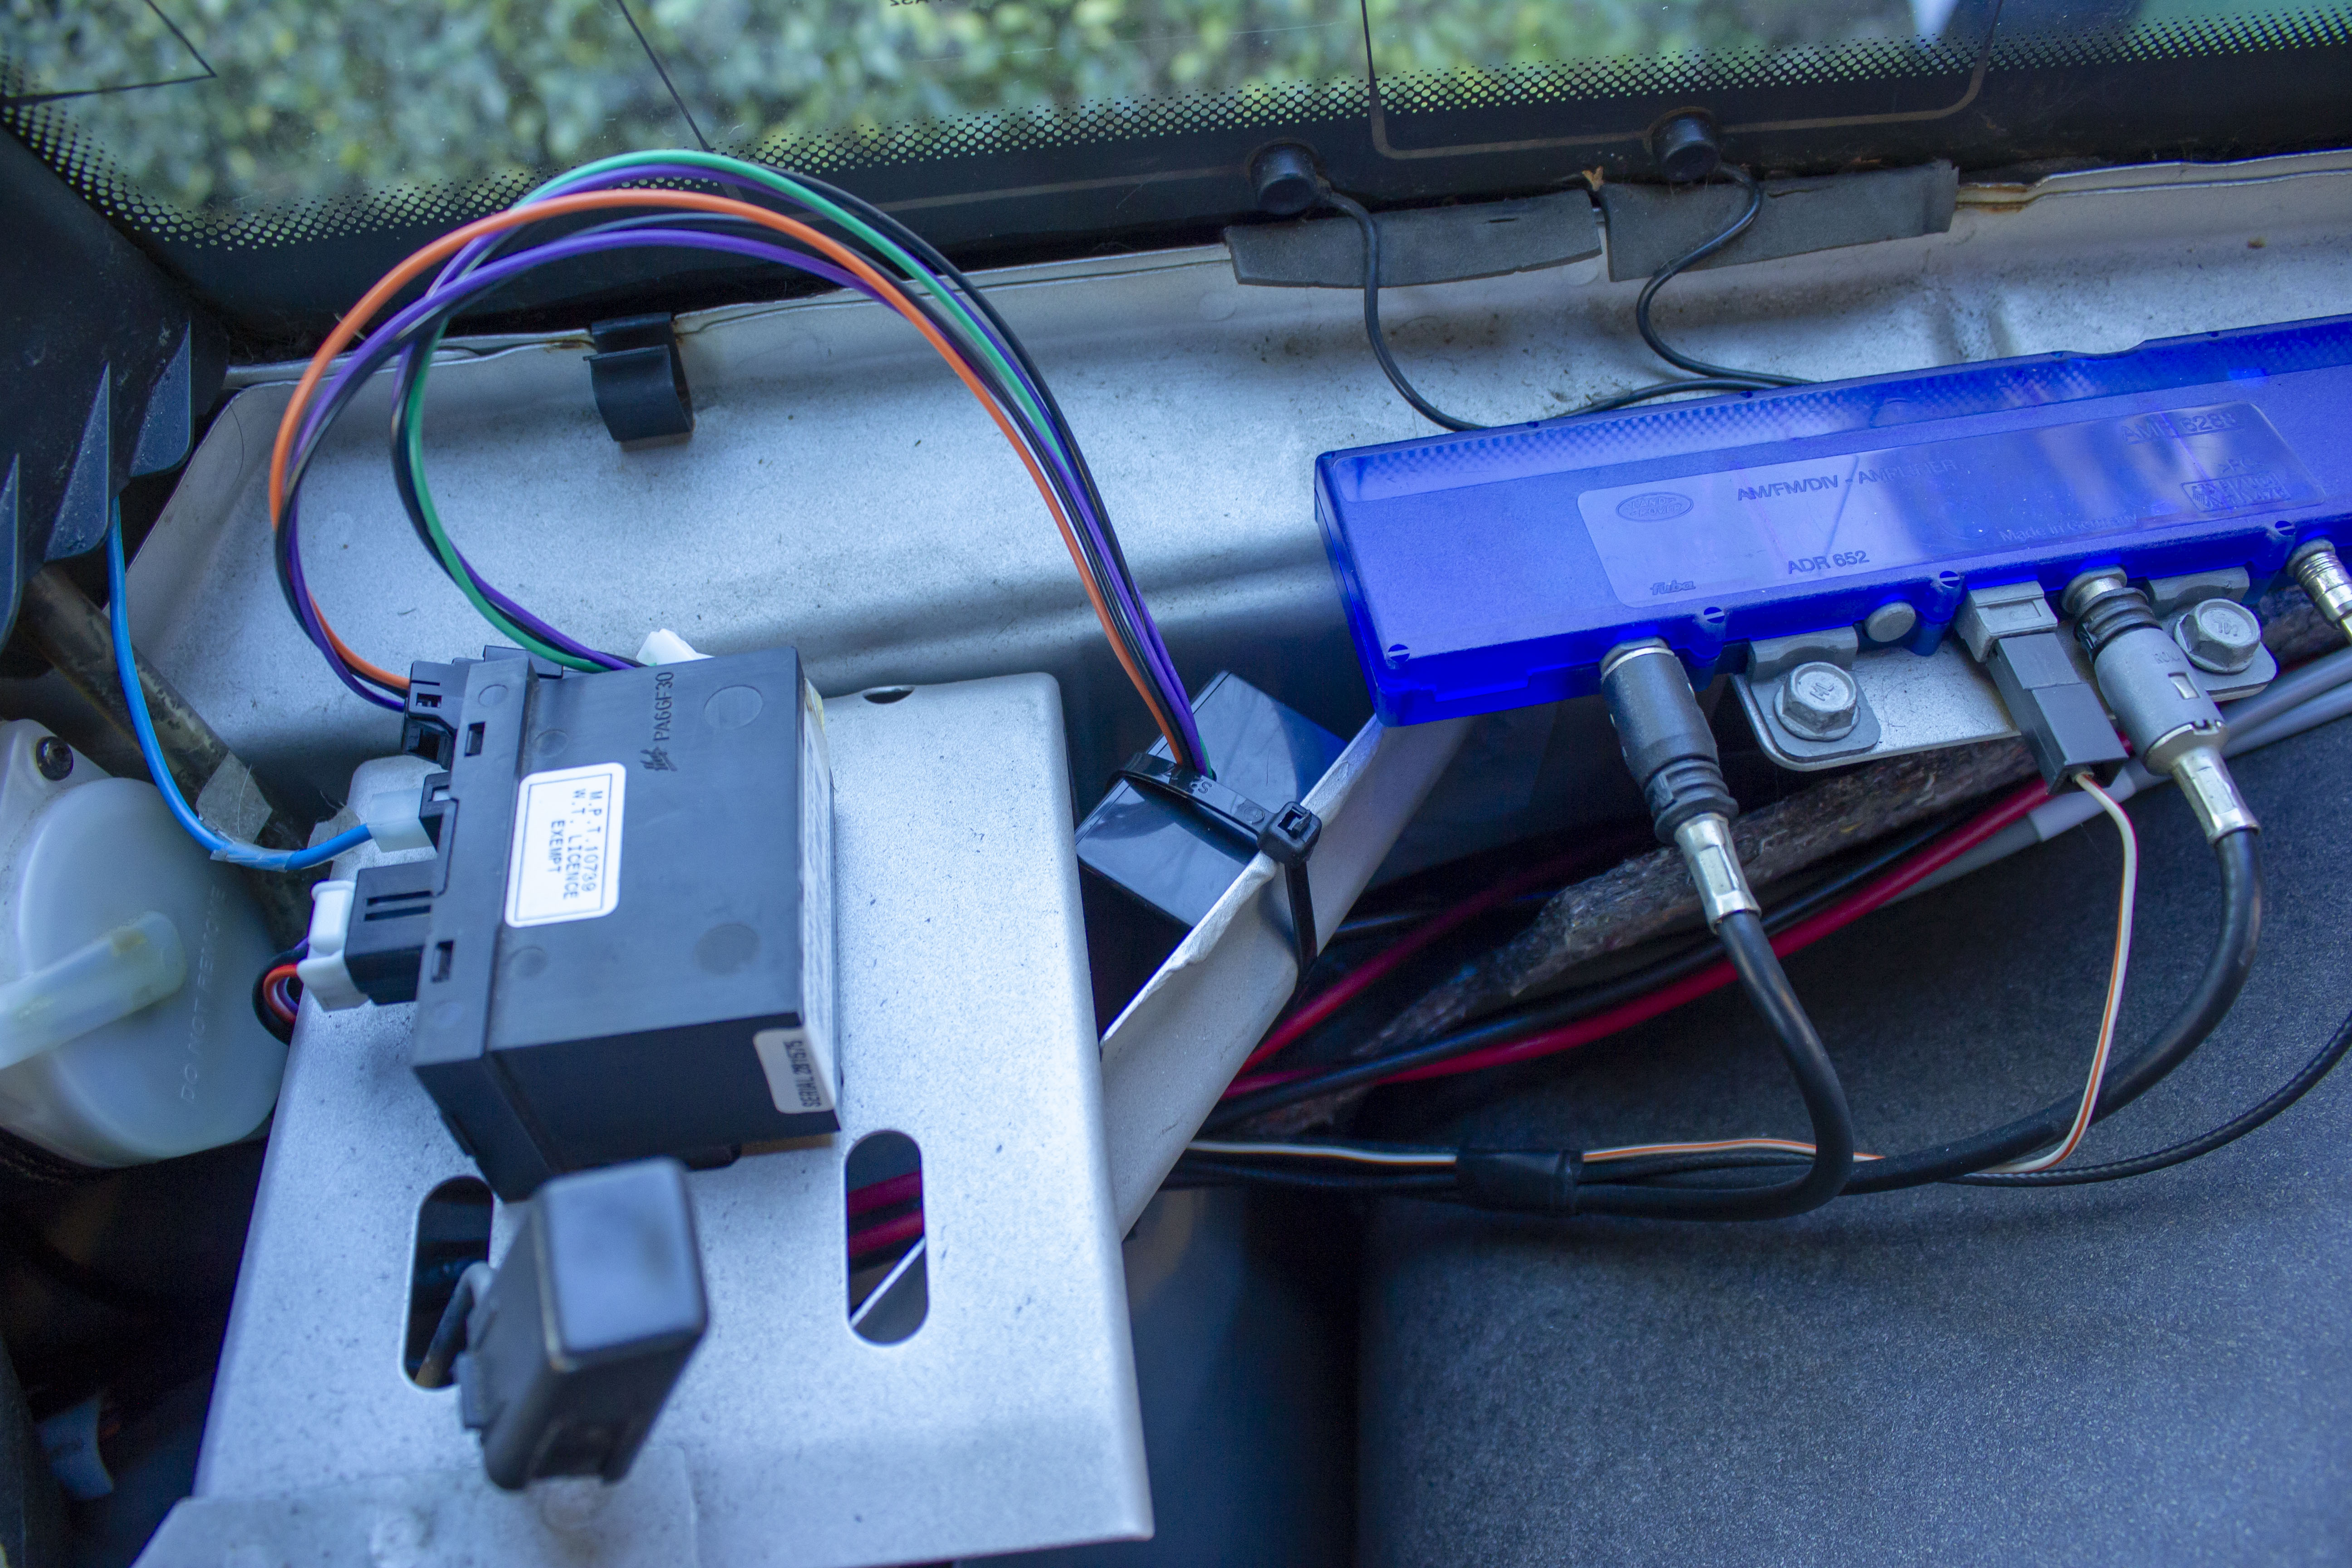
- Unplug the white three pin connector from the receiver by depressing the tab and pulling the connector body - do not pull on the wires! A flat bladed screwdriver or similar implement may be used to help lever the plug out from the receiver while depressing the tab - they can be somewhat stiff. Connect this into the black socket on the filter unit, and connect its own white plug back into the original receiver.
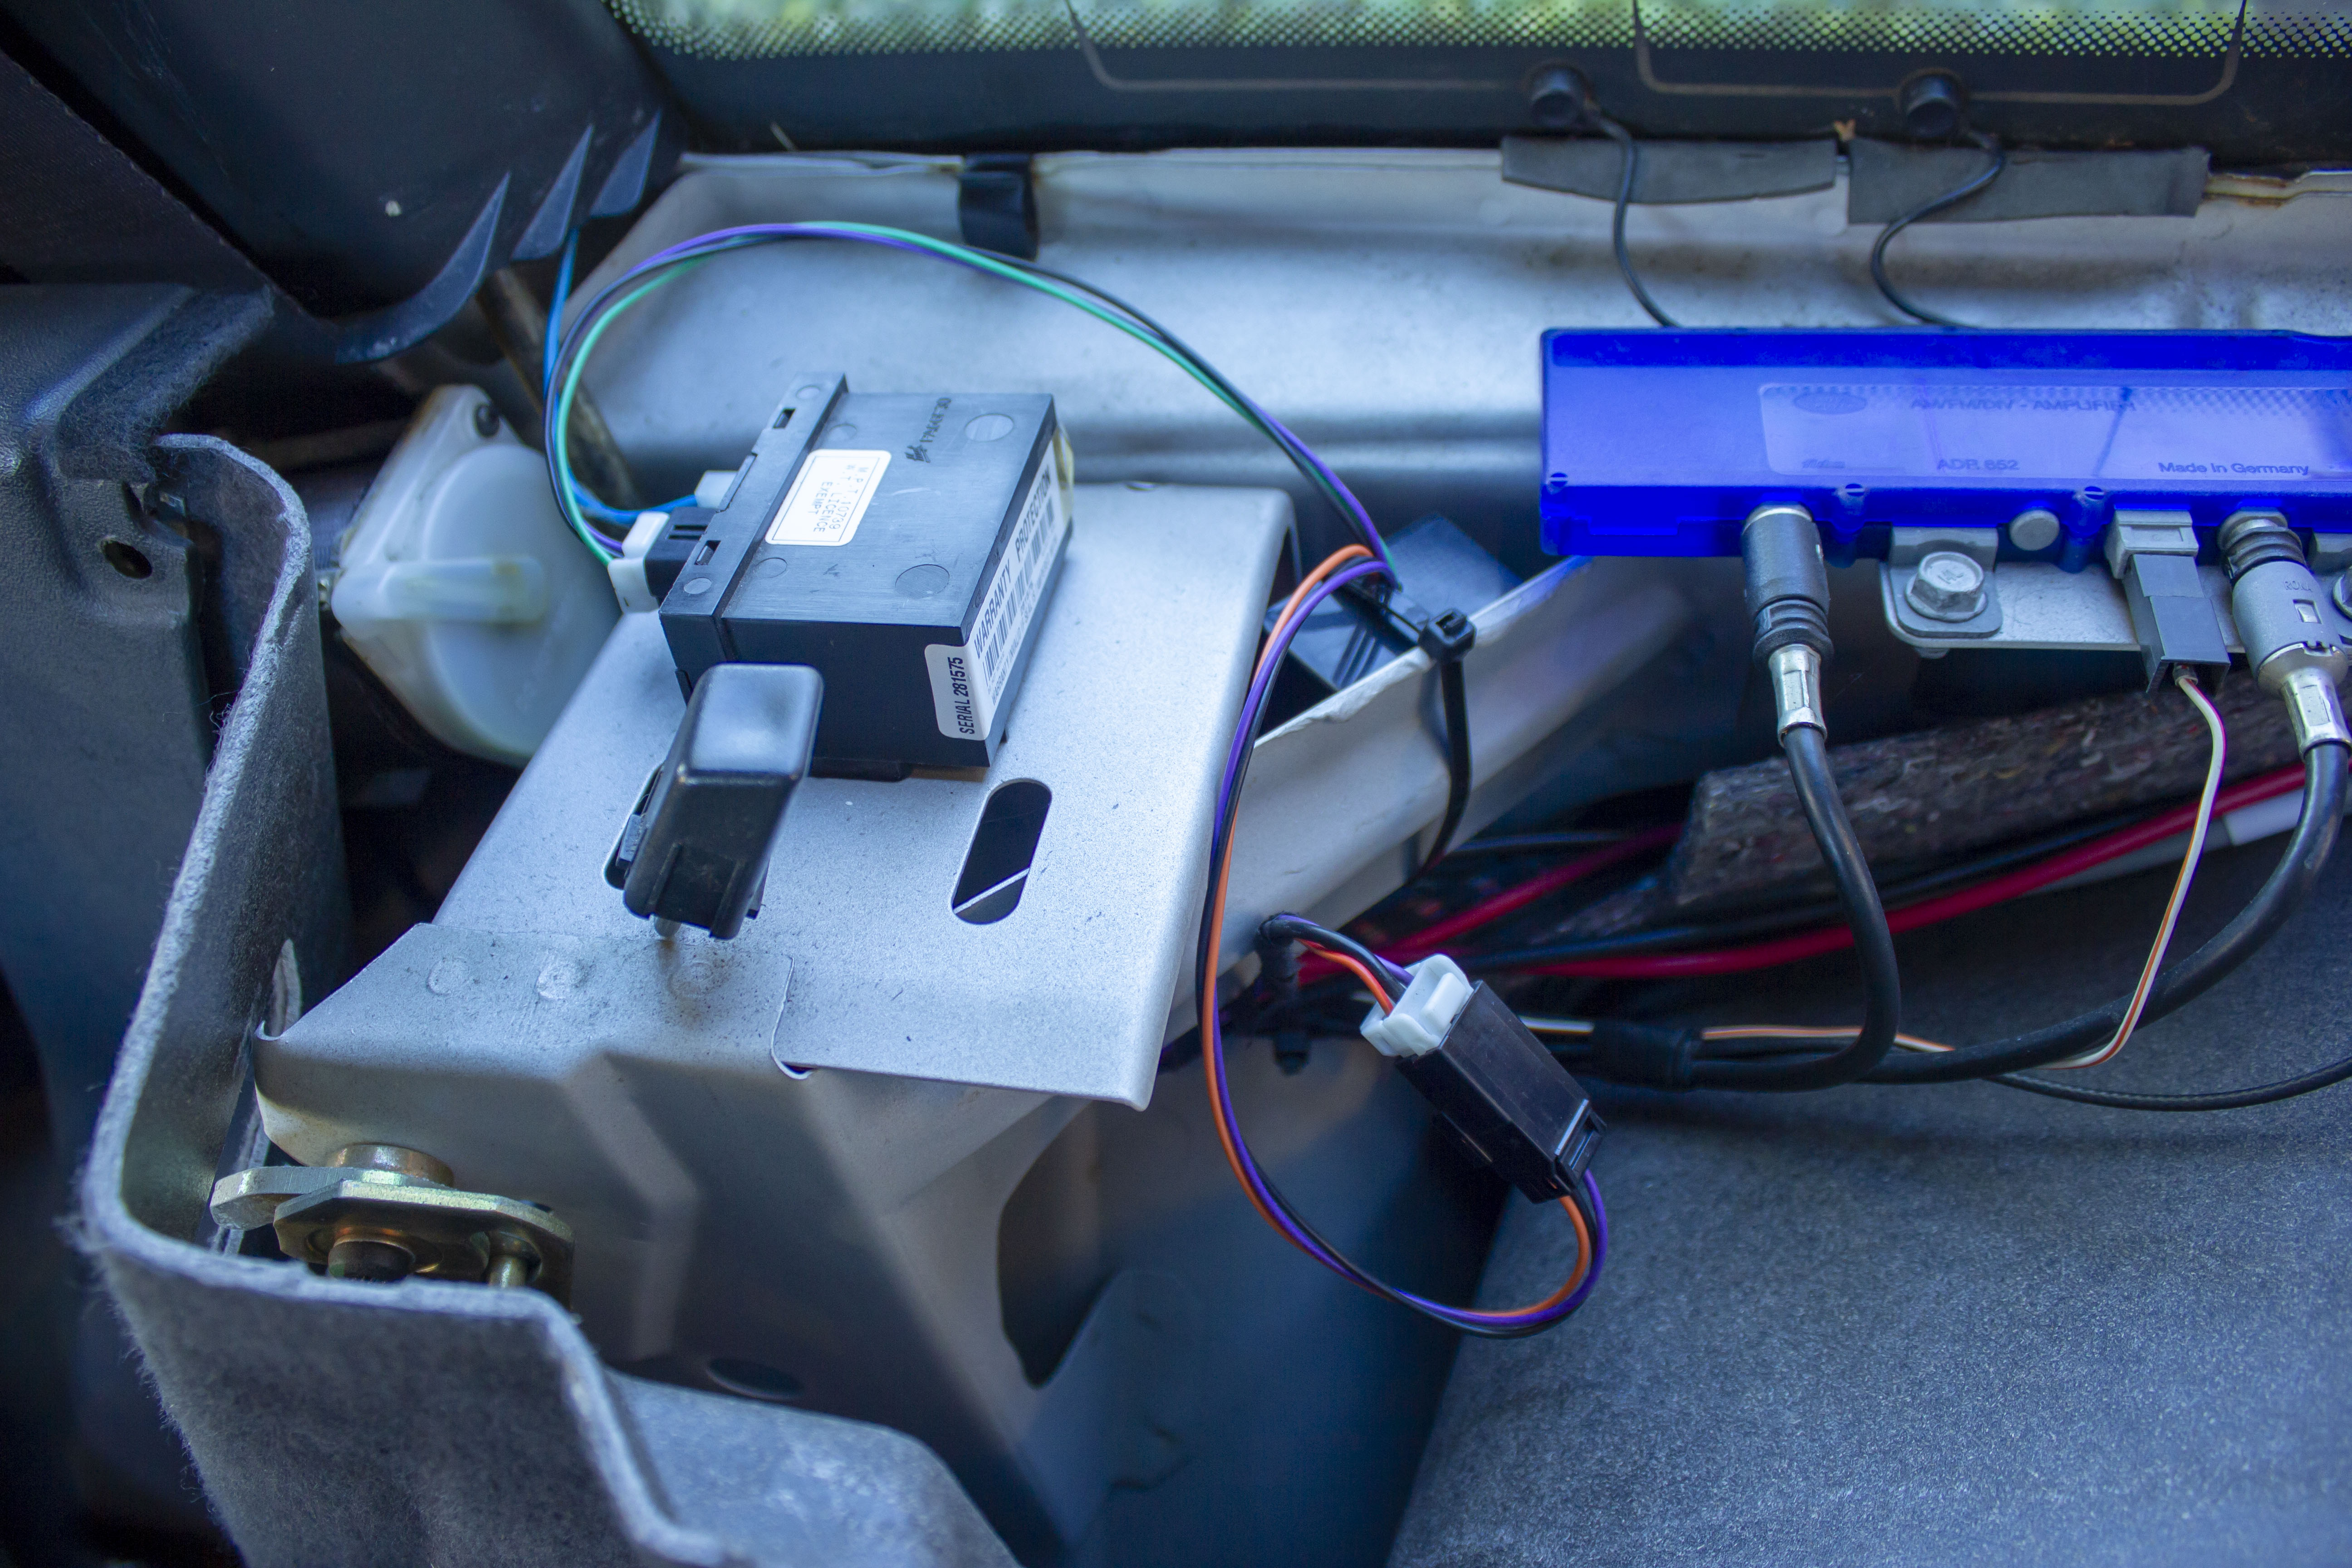
If the blue wire is currently disconnected, reconnect it to the receiver. The cables can be routed either both behind the original receiver, or with one cable around the receiver, and one cable underneath the framework. So long as the cables are not going to be caught by the seat belt mechanism or rear seat release, you can route them as you choose:
- Test the remote fob operation before continuing.
- The trim panel now needs refitting. Check the three metal clips along the window edge of the bodywork are in place.
- If any have stayed attached to the trim panel, carefully remove them from the panel, and re-clip them to the bodywork.
- Carefully lay the trim piece back where it goes. Reach under the front of the trim to guide the rear seat release button back into the hole in the trim.
- Sit the trim panel fully down and refit the trim clips and screw. You may need to push down gently along the window line to get the plastic lugs to re-engage with the metal clips.
- If any have stayed attached to the trim panel, carefully remove them from the panel, and re-clip them to the bodywork.
- Double check that the rear seat release button is through the trim before raising the rear seat! It's a pain (but not impossible!) To release the seat again if the button isn't there!
- Done! Enjoy having a P38 that sleeps soundly and won't be woken by stray RF!